ベクトル生成
ベクトル生成はストアと組み合わせて使用する必要があり、これはベクトルを理解する前にストアを理解する必要があることを意味します。
ベクトルは実際には埋め込みの結果であり、テキストや画像などの様々な種類のデータを密なベクトル表現に変換するプロセスです。 このステップは、Casibase内で効率的なデータ処理と分析を容易にするために不可欠です。 埋め込みにより、チャットの質問とストレージ内の知識ファイルが、次の知識検索に使用されるベクトルに変換されます。
1。 Automatic Embedding
Casibase automatically generates vectors when you upload files to a store. After configuring a store with storage, model, and embedding providers, simply upload your files through the file tree interface. The system immediately queues them for embedding and processes them in the background.
Each file progresses through states you can monitor in the Files page: Pending, Processing, Finished, or Error. The system calculates token counts during embedding and displays them alongside each file. If embedding fails for any file, the error details appear in the file list so you can quickly identify and fix issues like missing provider configurations or unsupported file formats.
When you delete files from storage, their vectors are automatically removed from the database. This keeps your knowledge base synchronized - you won't get outdated responses from files that no longer exist.
2. ベクトルの更新
各ストアデータのストアメニュー内に、リフレッシュベクトルアクションがボタンとして設定されています。 After configuring stores with storage providers, navigate to the Stores page to view the file tree for the storage providers.
By clicking on the Refresh Vectors button for a particular store, it will generate the corresponding vectors for all the files in the file tree for that store by embedding them. 以下の図は、ページとその操作を示しています。

When you refresh vectors, the system automatically removes all existing vectors for that store before generating new ones. This ensures your vector database stays synchronized with your current files - if you've deleted files from storage, their vectors will be removed as well. The refresh always creates a clean, up-to-date vector set based on your current file tree.
Re-embedding Individual Files
For targeted updates, use the "Refresh Vectors" button in the Files page next to any specific file. This regenerates vectors for just that file while leaving others untouched - useful when you've changed embedding settings or need to fix errors on specific documents without reprocessing your entire knowledge base.
3. ベクトルの表示
After that, we can view the specific vectors generated by that store in the vector menu.
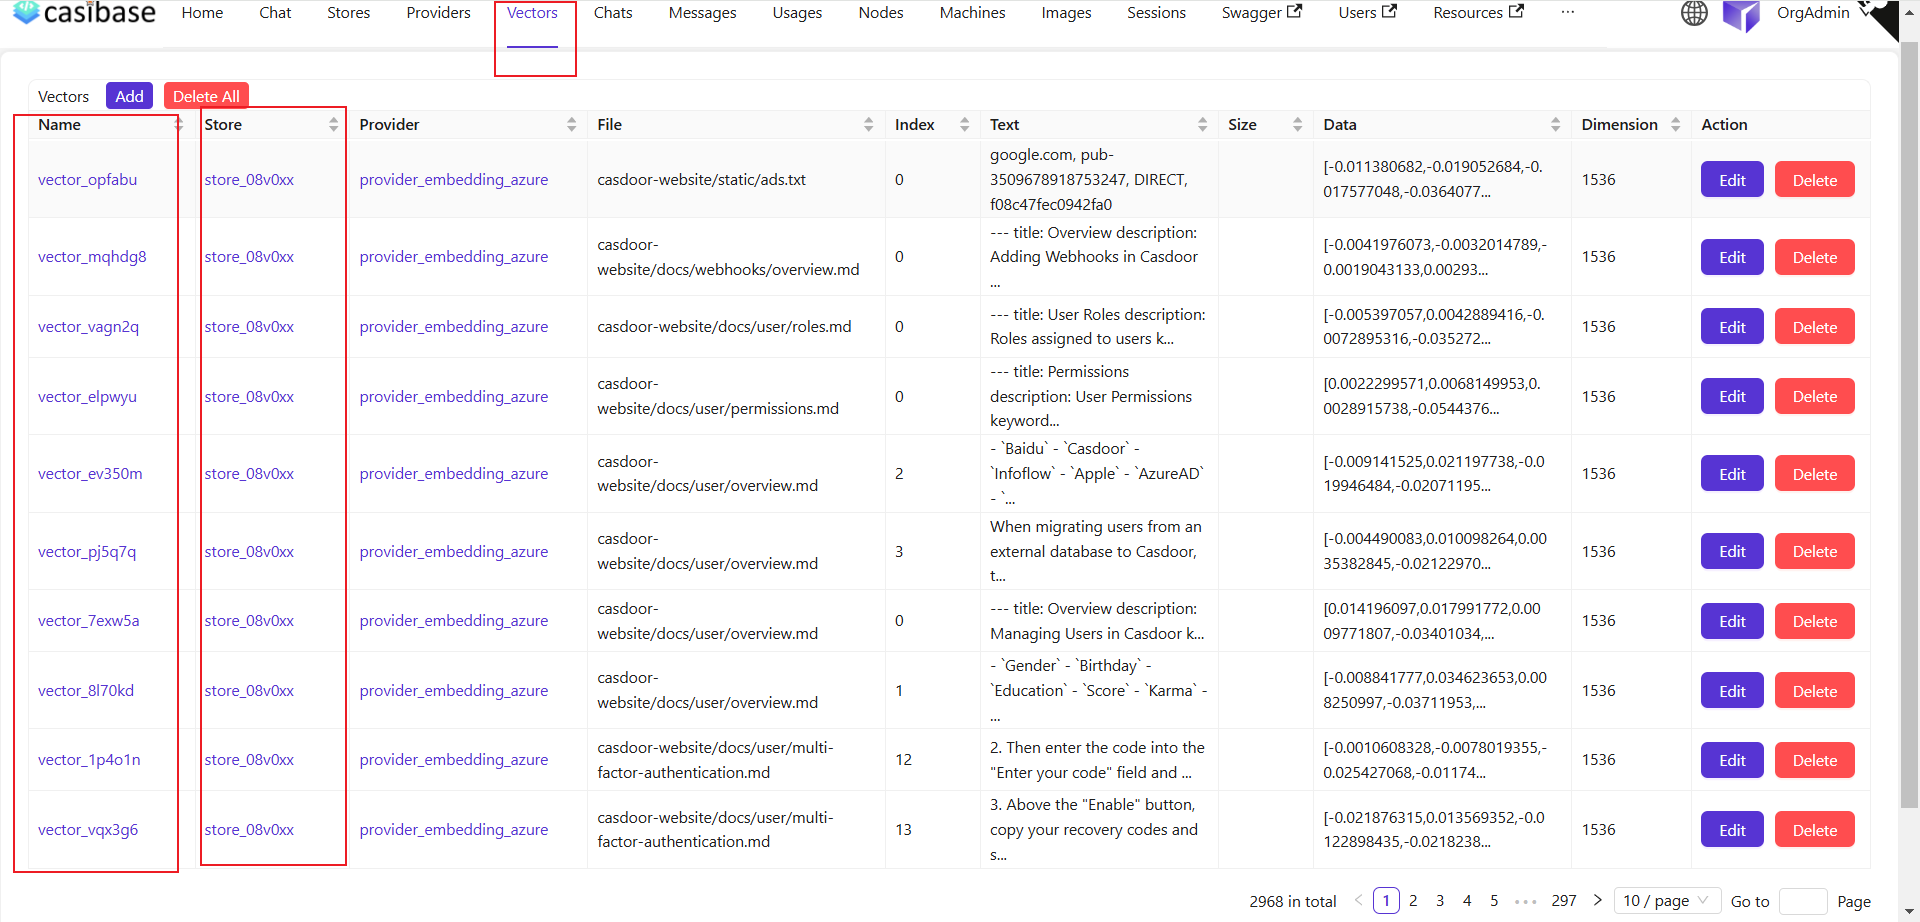
見ての通り、前のベクトル更新ステップのストアファイルがベクトルに変換されてここに表示されています。
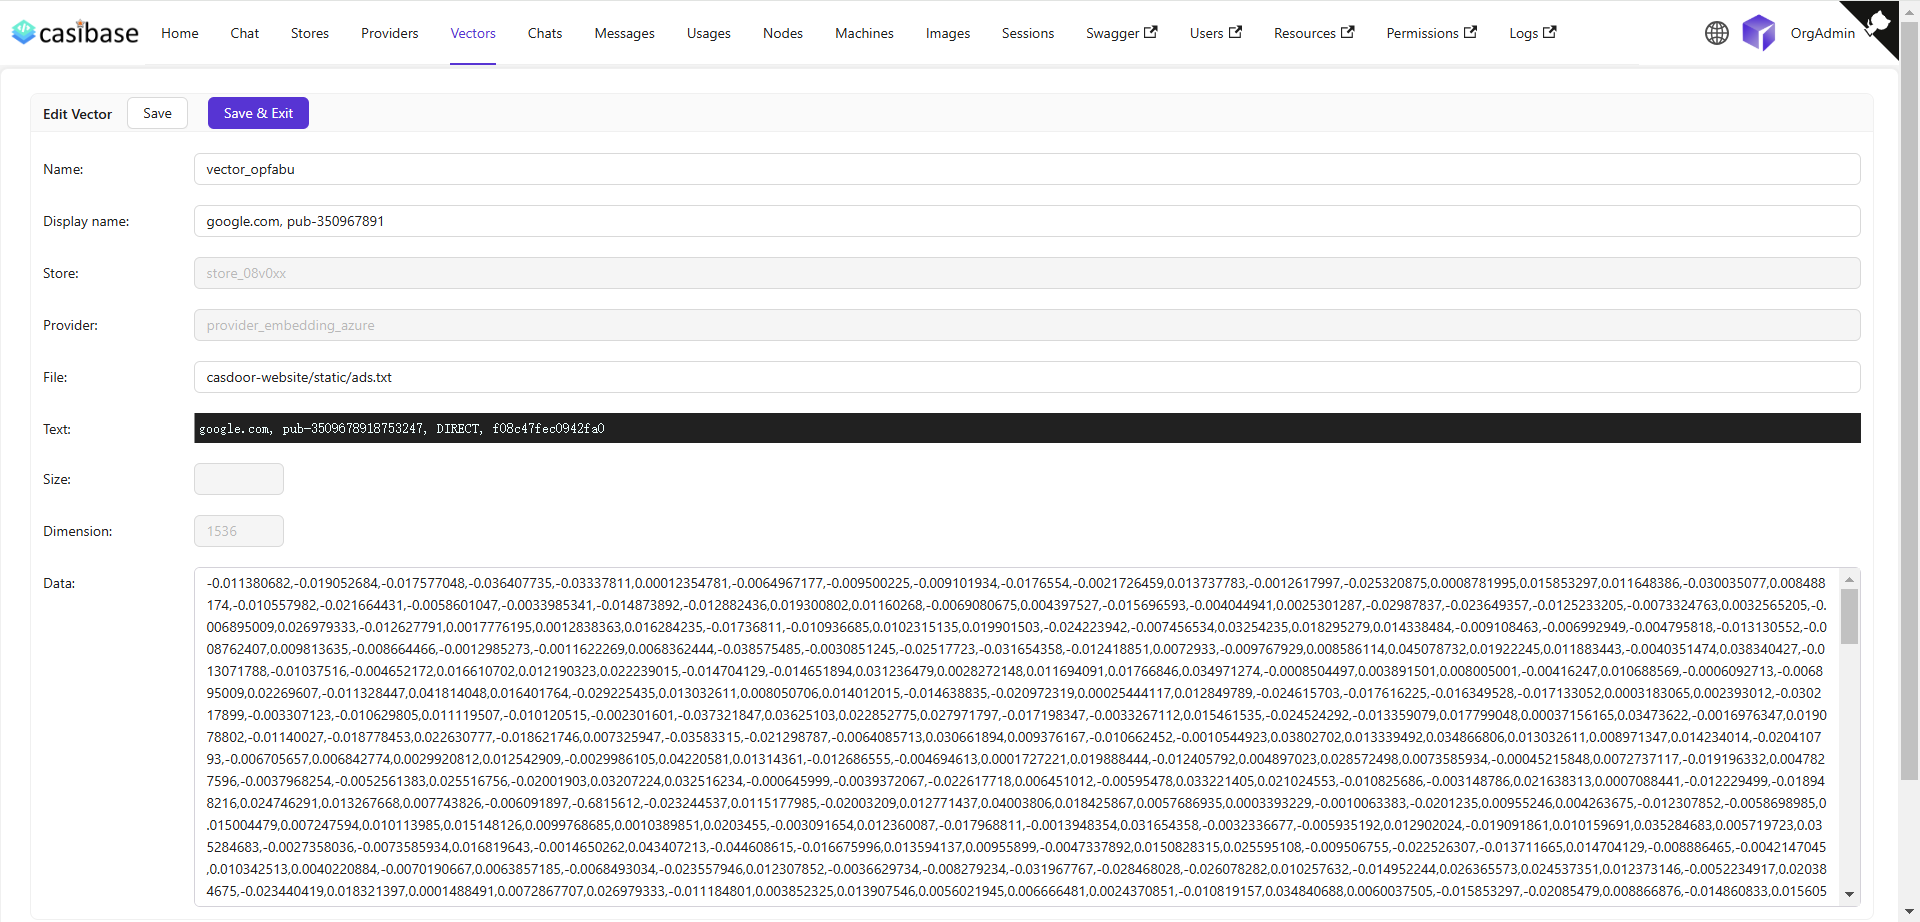
私のベクトル編集ページには、ストア名、埋め込みモデル名、埋め込まれたファイル名、ファイルサイズ、次元、ベクトルデータなどの具体的な情報が表示されます。